


Installing a kitchen sink drain is a necessary step when replacing an old sink during a kitchen renovation.
The Spruce / Kevin Norris
The process can vary based on the differences between the new and old sinks and any additional items, like a garbage disposal, being added. For instance, different sink depths might require adjustments to the branch drain pipe in the wall.
Before You Begin
Kitchen drain traps are available in various bundled kits containing different configurations of parts to match specific situations—some for single-basin sinks, some for double-basin sinks, and some for sinks that will include a garbage disposal. Both chromed copper and PVC plastic drain trap kits are available; most people now use plastic parts for kitchen sink drains, which are generally hidden from view.
Most kitchen drains are 1 1/2 inches, but occasionally you may find a 2-inch outlet. Use adapter fittings to connect a 1 1/2-inch drain kit to a 2-inch outlet.
Flexible, corrugated tubing can make installation easier but may lead to clogs. Smooth pipes, cut precisely to size, are better for good water flow.
Need more help? Talk to a plumber near you
Our partners can help you compare quotes from top-rated professionals near you
Get a Quote
The offers that appear in this table are from partnerships from which The Spruce receives compensation.
Instructions
The Spruce / Kevin Norris
-
Check the Drain Outlet Height
Before removing the old sink and buying a new kitchen sink, it is a good idea to check the height of the trap arm on the old sink. The trap arm is the horizontal piece between the U-shaped trap bend (the P-trap) and the branch drainpipe in the wall. It connects to a sanitary tee fitting in the branch drain and should slope down toward the tee at about 1/4-inch per foot for proper drainage.
Measure up from the floor or base of the cabinet to the center of the trap arm. If the height is more than 16 inches, you may find that a new sink will not allow for the necessary downward slope for the trap arm.
Credit: The Spruce / Kevin Norris
-
Lower the Drain Outlet, If Necessary
If you find that the existing drain outlet is not low enough to accommodate the depth of the new sink, you (or a professional) will need to open the wall and lower the position of the sanitary tee connecting to the drain pipe in the wall. This can be a somewhat complicated job that requires cutting away the back of the cabinet and the wall surface.
Our example is a case in point—the new sink left insufficient room for connecting a standard drain assembly to the drain outlet in the wall (left photo). So, the sanitary tee fitting serving as the drain outlet has been lowered (right photo). Keep in mind that the drain height must leave enough room for removing the trap and cleaning it out.
If you need to lower the sanitary tee in the branch drain, it is a good idea to wait until the other parts of the drain are test-fitted before gluing and securing the fittings permanently.
Before continuing to the next steps, remove the old sink and install the new sink in the countertop. Our installation will include a double-basin sink with a garbage disposal fitted to the right basin.
Credit: The Spruce / Kevin Norris
-
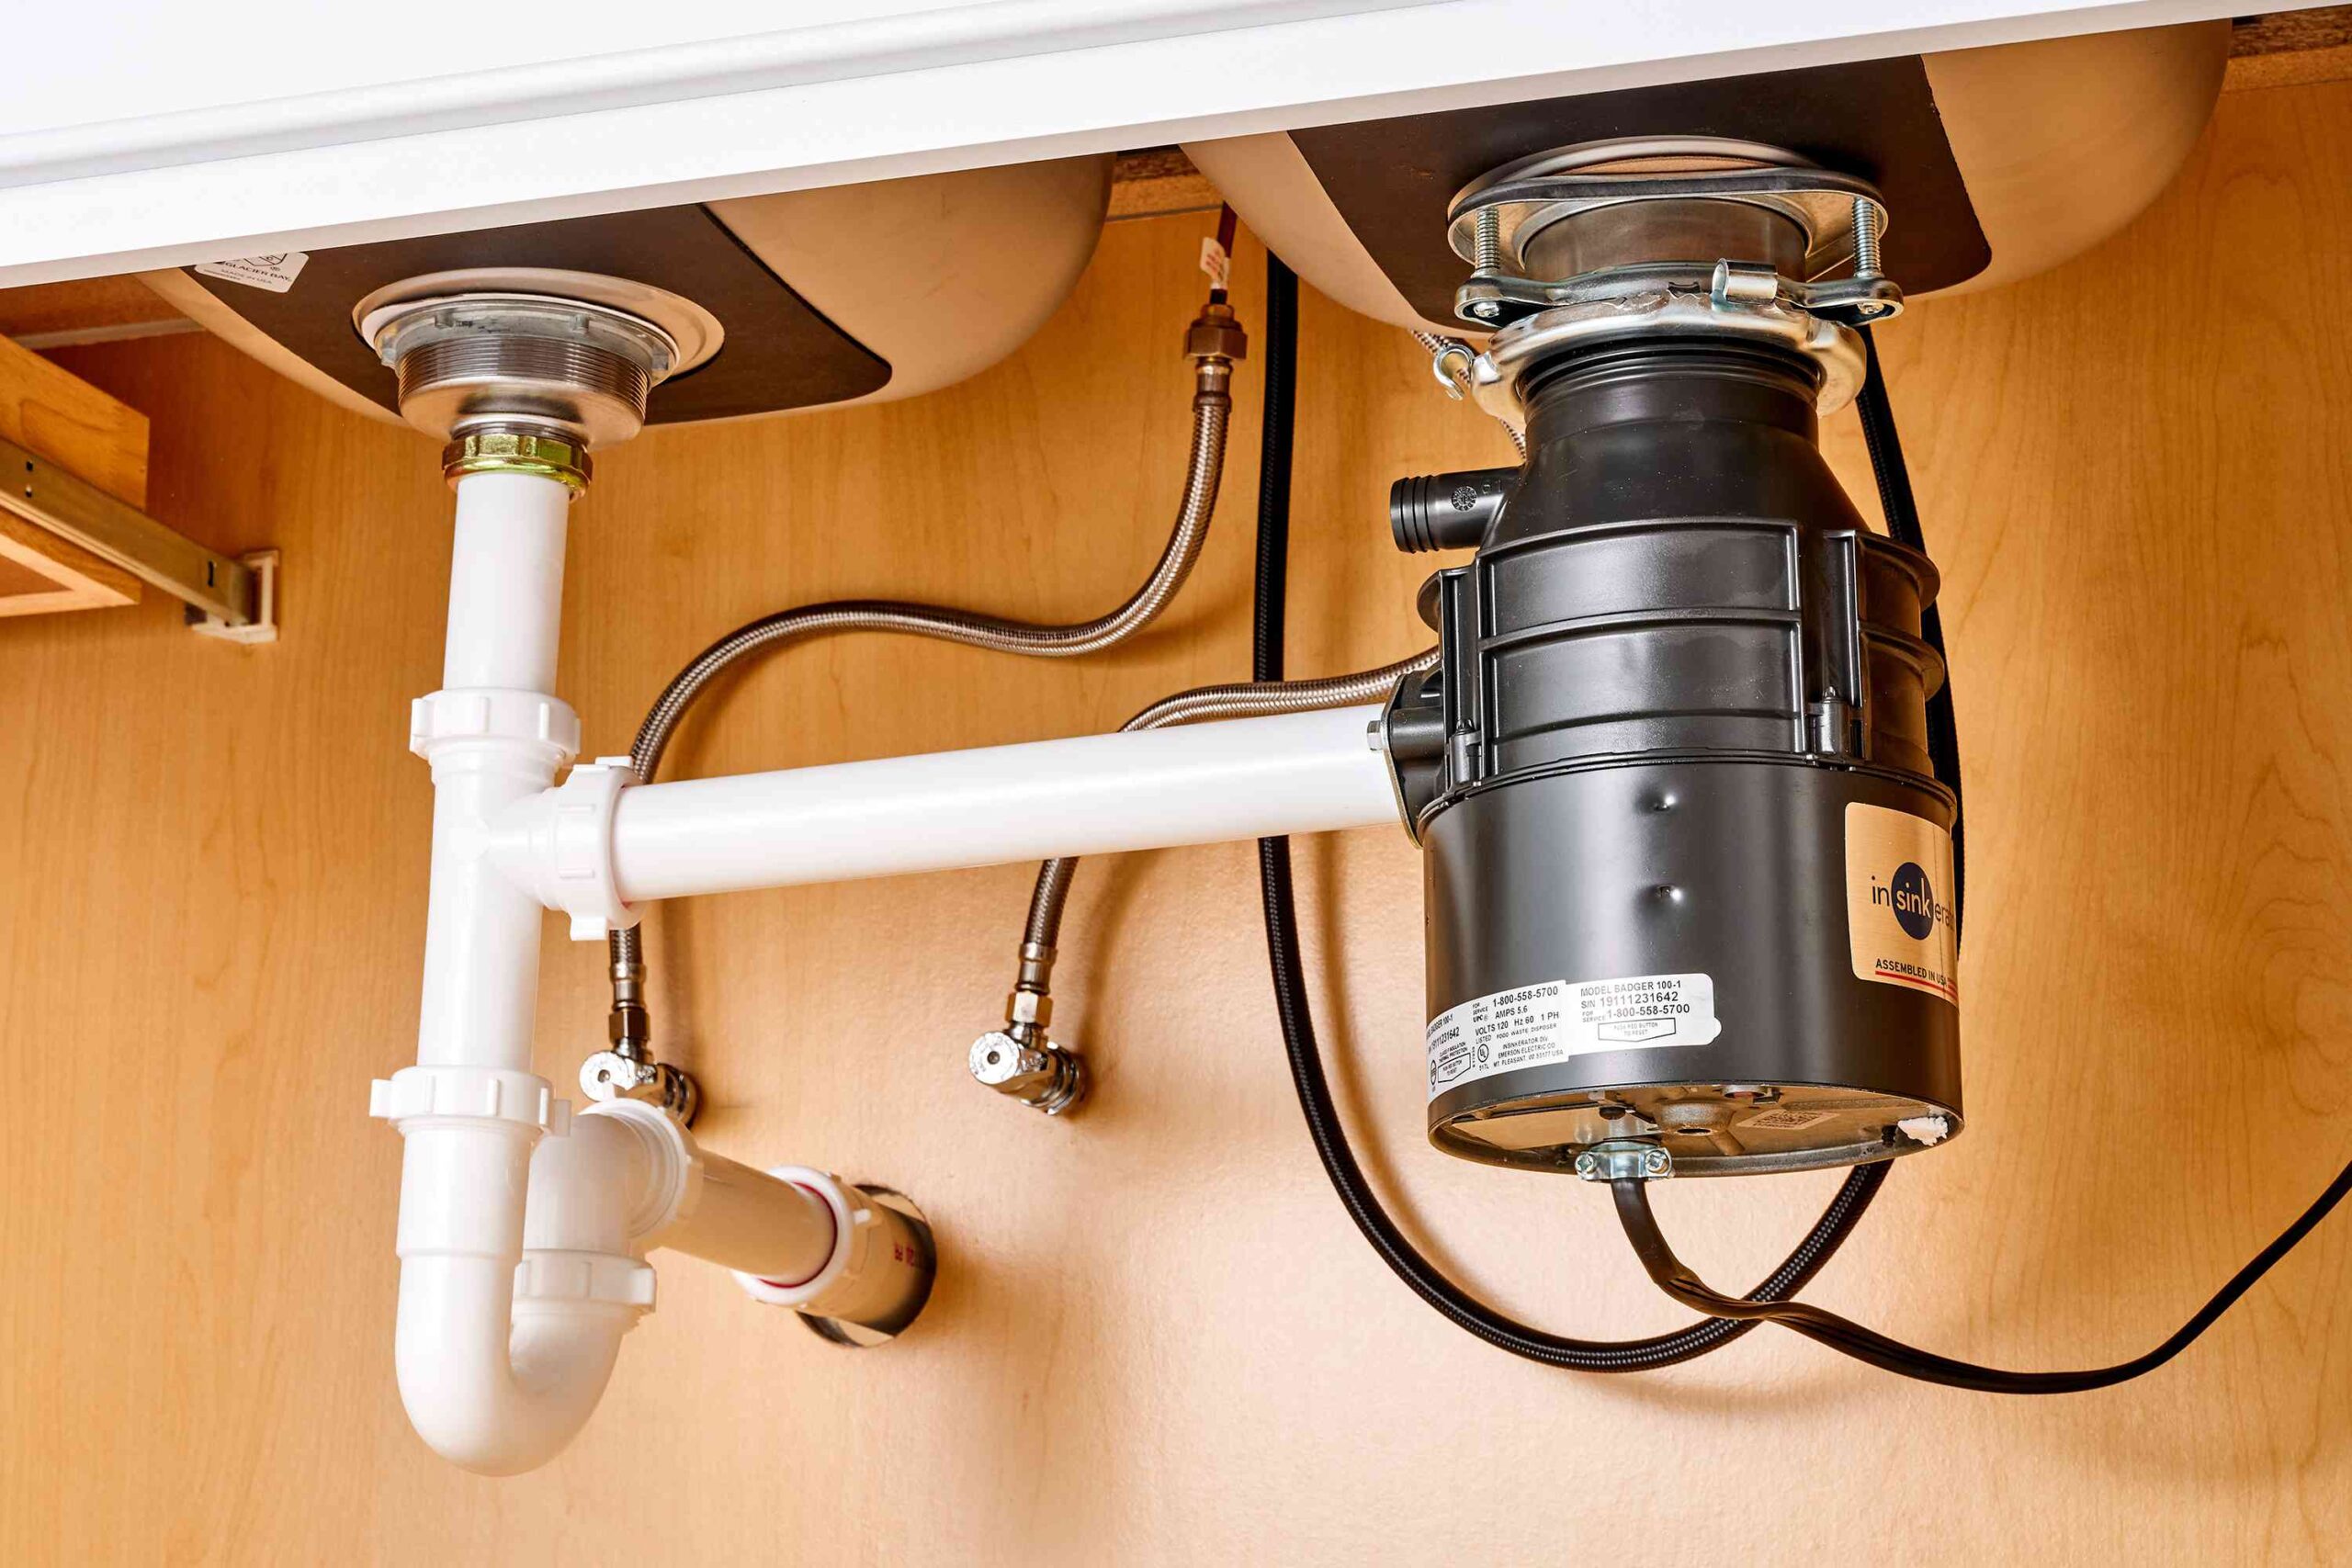
Install the Garbage Disposal and Strainer
First, install the garbage disposal onto the desired side of the sink, since this takes up the most space.
Next, install a basket strainer onto the remaining sink basin. This is also a good time to install any other under-sink components, such as a water filter or a hot water dispenser. You will need to work around these fittings as you connect the drain pipes.
Credit: The Spruce / Kevin Norris
-
Install the Drain Tailpiece and Continuous Waste Pipe
The drain tailpiece is a short vertical length of straight pipe that joins the sink strainer to a tee fitting. The side outlet on the tee fitting will accept the continuous waste pipe coming from the garbage disposal (or the other sink basin), while the bottom outlet will continue on to the drain trap.
Temporarily install the tailpiece onto the sink strainer, using a slip nut (and slip washer, as applicable). Temporarily connect the curved end of the continuous waste pipe to the garbage disposal’s drain outlet, using a slip nut and washer. Let the straight end of the pipe extend past the vertical tailpiece on the sink basin. The pipe should slope downward slightly toward the tailpiece.
Hold the tee fitting up to the tailpiece and waste pipe, and mark cutting lines on both pipes, where they will fit into the tee fitting. Now, cut the tailpiece and continuous waste pipe to length with a PVC tubing cutter or a hacksaw.
Reinstall the tailpiece and continuous waste pipe, along with the tee, leaving the connections hand-tight. Adjust the pieces as necessary, making sure the continuous waste arm has a slight downward pitch toward the tee fitting.
Tighten the slip nuts slightly more with channel-type pliers. These do not need to be overly tight; the plastic threads can be damaged if you use too much force.
- Note: If your sink has a single basin, it will not require a tee fitting on the end of the tailpiece—the tailpiece will lead directly down to the drain trap. If you have a double-basin sink but neither basin will have a garbage disposal, the tee fitting is installed on one basin’s tailpiece, with the side outlet of the tee accepting a continuous waste pipe from the second basin.
Credit: The Spruce / Kevin Norris
-
Connect the Drain Trap
The drain trap assembly includes a U-shaped trap bend and a J-shaped trap arm. The trap bend fits onto the bottom of the tailpiece tee fitting, while the trap arm extends into the drain outlet in the wall.
Assemble the trap bend and trap arm together loosely with a slip nut and washer. Slide a slip nut and washer onto the straight end of the trap arm. Push the trap bend up into the tee fitting on the tailpiece while sliding the trap arm into the drain outlet at the wall.
Adjust the trap pieces as needed to create the most direct path from the sink to the drain outlet. Make sure the trap arm has a slight downward angle toward the drain outlet.
Mark and cut the trap arm as needed if it is too long to fit the space, then reinstall the P-trap assembly. Tighten all slip nuts with channel-type pliers. Again, don’t overtighten.
Confirm that the continuous waste pipe and the trap arm slope slightly downward in the direction of the water flow, then check all of the drain connections to make sure they are tight.
Credit: The Spruce / Kevin Norris
-
Check for Leaks
Run water in both sink basins and check for leaks at each pipe joint. Tighten up any connections that leak. Conduct a final test by filling up each sink basin and letting them drain quickly while you check for leaks below.
It’s not uncommon for slip-nut joints to leak slightly. Fixing this usually requires just some minor adjustment. If initial tightening doesn’t stop the leak, unscrew the nut, reposition the washer, and re-tighten the nut, making sure it’s not cross-threaded.
Credit: The Spruce / Kevin Norris
Read the full article here


